Tech Tip: 4x6 Photo Collages (with a freebie)
 Happy, happy Tuesday to you. It’s time for a tech tip and a freebie!
A lot of people have been commenting on or asking about the photo collages I’ve been including on my Project Life pages. When I first starting doing Project Life digitally, I found some designers selling and giving away templates for photo collages (here, here and here are the ones I’ve picked up along the way).
Along the way, I made my own template that features 6 square photo spots (since I use a lot of Instagram photos) and I’ve been using this particular template all the time.
Here’s what it looks like (click on the image to download the template):
So wanna use my template for your pages? I’ll show you how I use it.
To get started, download my 4x6 photo collage template (it’s a layered, Photoshop template) here. Once you have it downloaded, open it up along with some photos you want to use.
Now we’re ready to get started.
Step One:
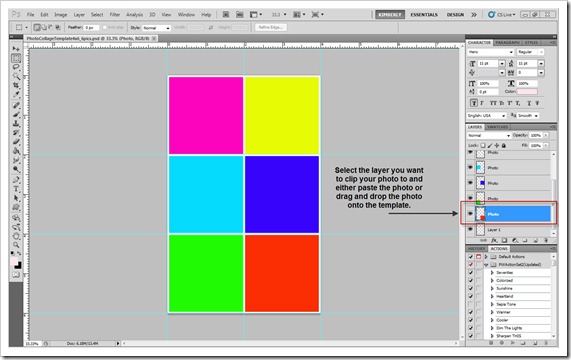
Select the layer you want to clip your photo to ... and either paste the photo or drag and drop the photo onto the template.
Step Two:
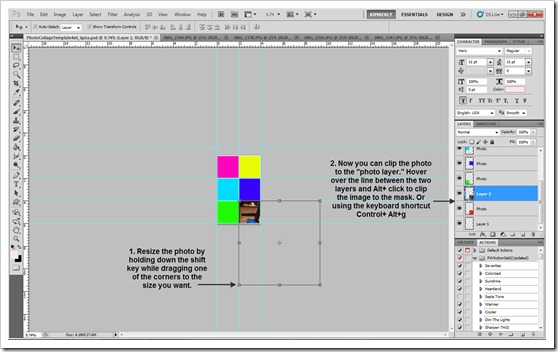
Resize the photo by holding down the shift key while dragging one of the corners to the size you want. Now you can clip the photo to the "photo layer." Hover over the line between the two layers and Alt+click to clip the image to the mask. Or using the keyboard shortcut Control+ Alt+G.
Step Three:
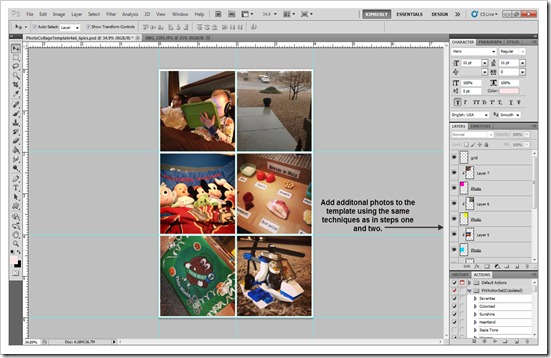
Add additional photos to the template using the same techniques in steps one and two.
Step Four:
Flatten your image. This can be done by selecting any layer, right click and then chose the action “Flatten Image.”
Step Five:
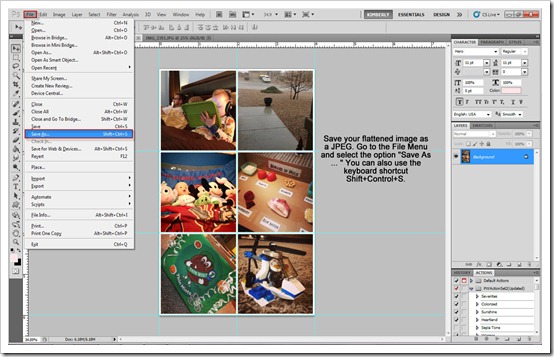
Save your flattened image as a JPEG. Go to the File Menu and select the option "Save As ... " You can also use the keyboard shortcut Shift+Control+S.
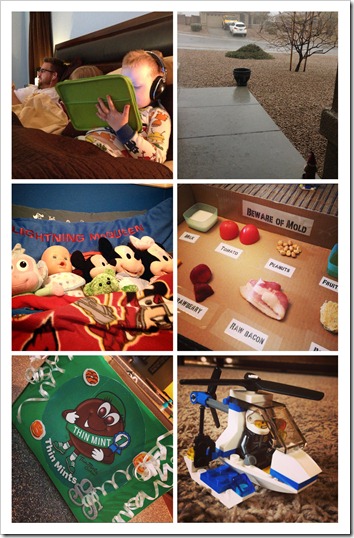
And this is what my finished, flatten JPEG looked like:
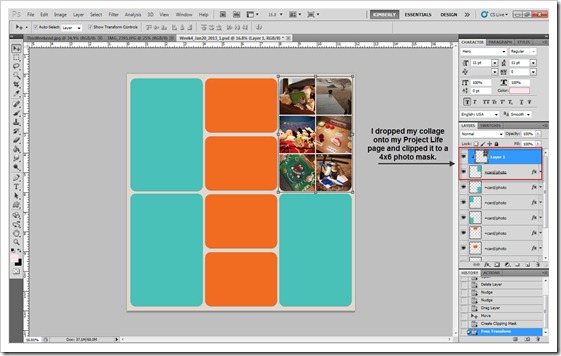
Now that I have a flattened JPEG, I can add my photo collage to my Project Life page, just like I would with any other photo. Once I have it on my page, I can clip the image to a 4x6 photo block on the page. This is what it looks like on my page:
************************
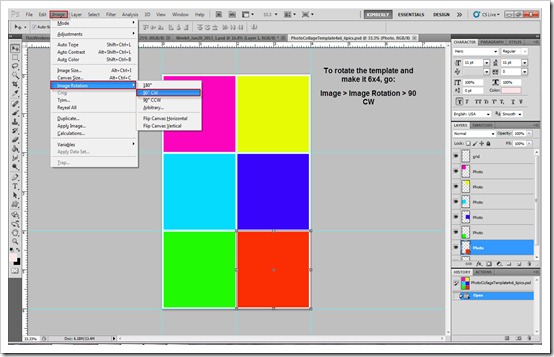
For the above example, I used the template as created as a 4x6 (portrait) template. You can always rotate it if you want a horizontal version.To rotate the template and make it 6x4 (horizontal/landscape) go to Image > Image Rotation > 90 CW (see example below).


