Tech Tips: Using the smudge tool
Sometimes when you’re sharing your projects online you want to obscure some of the journaling or maybe a face. It’s super easy to blur out some of that sensitive information or the face of someone who’d rather have floating around the Internet.
As always, this is the way I blur photos or journaling… I’m sure there are a zillion other ways to do it. I work in full Photoshop, so these steps are shown in Photoshop, but can be adapted for Photoshop Elements.
Here are three easy steps to get the job done:
Step One:
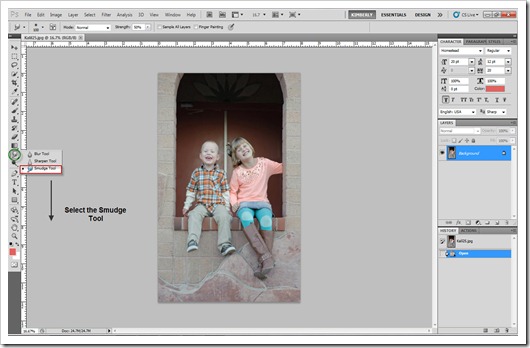
Select the Smudge Tool from the tool bar.
Step Two:
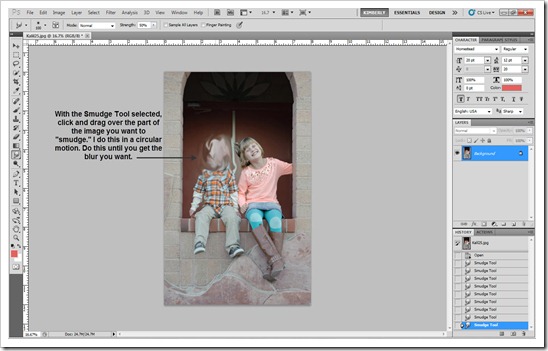
With the Smudge Tool selected, click and drag over the part of the image you want to "smudge." I do this in a circular motion. Do this until you get the blur you want.
To decrease the size of the Smudge Tool, with the Smudge Tool selected, click on the left bracket key (on your keyboard) and the tip of the Smudge Tool will shrink. To make the Smudge Tool larger use the right bracket key.
Step Three:
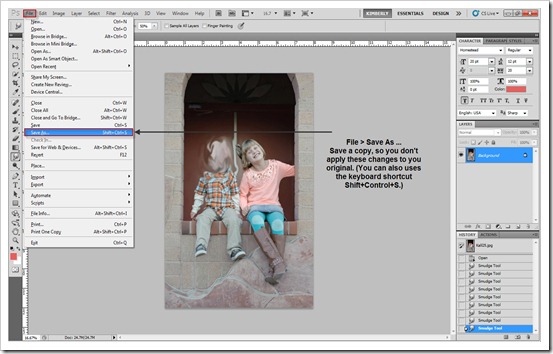
Save a copy, so you don't apply these changes to you original. Do this with the “Save As” action: File > Save As ... (You can also uses the keyboard shortcut Shift+Control+S.)


