Resizing printables
If you’ve been reading my blog this year, then you know I’ve been making a ton of printables. In addition to making them, I’ve actually be incorporating them into my home décor. We recently converted a room of our home into a guest room. We’ve had two home offices for years now (his and hers) and truth be told, we weren’t using the “hers.” When I work at home, I like to sit at our breakfast bar … in the middle of all the action. Even when no one is home, I’d rarely go into my office and would gravitate to the center of our home. It has good light; the breakfast bar is at a higher level (something I like); and it’s close to the kitchen (quick access to more Diet Dr. Pepper).
Anyway, with my parents coming to town earlier this month we got a wild hair and decided to convert our never used space into a guest room that would certainly get used.
After we cleared out the room, I realized the walls need some art work. It didn’t take long for me to decide what to do with all this free space. I was excited at the prospect of filling the walls with some of my own digi art and the finished product is more lovely than I could have imagined.
However, some of the sizes of the prints I made weren’t conducive to finding standard size frames. I love to make square shaped pieces and when I went to Michaels to get some frames (I had a coupon) and all I could find were 10x10 frames and 5x5 frames. I didn’t want to pay for custom framing, so I resized my artwork and used an off-the-shelf frame.
Here’s a look at how I resized the image to fit in the frame I purchased:
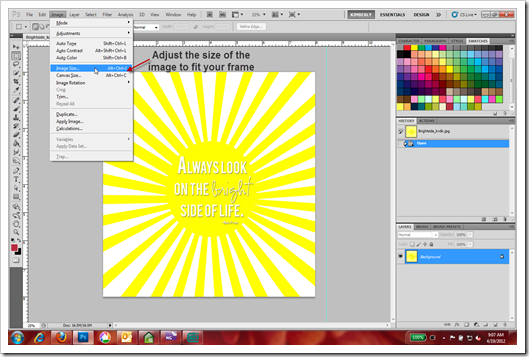
1. I opened the original file (the flattened JPG file), see above.
2. Then, I went to Image/Image Size so I could adjust the size of the entire image.
3. From here, I could see that the image was 8 inches by 8 inches, which was too large for the 5x5 frame I had purchased .
4. Making sure the “Constrain Proportions” option is selected, I changed the dimensions of the document to 5 inches wide and 5 inches tall. This will proportionally resize the entire document.
5. Save! And you’re ready to print. You could upload the file to a printer (I use Costco a lot or Persnickety Prints). But for this particular project, I printed at home. I used some textured, 8x11 cardstock (Bazzil) because I wanted some of the texture to be woven into my piece. Then I trimmed the print and added it to my frame.
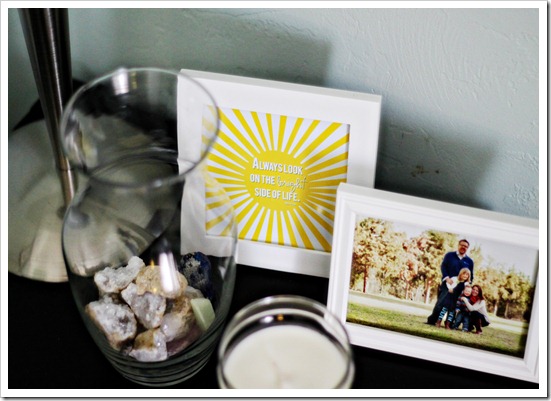
Here’s what it looks like sitting on the side table of our newly re-done guest bedroom. In addition to printing out this piece, I did five others printables I’ve created this year and those are hanging on the west wall of the room. It makes the space super personal. I love it.
************************************
You can download your own copy of my “Brightside” printable here.


